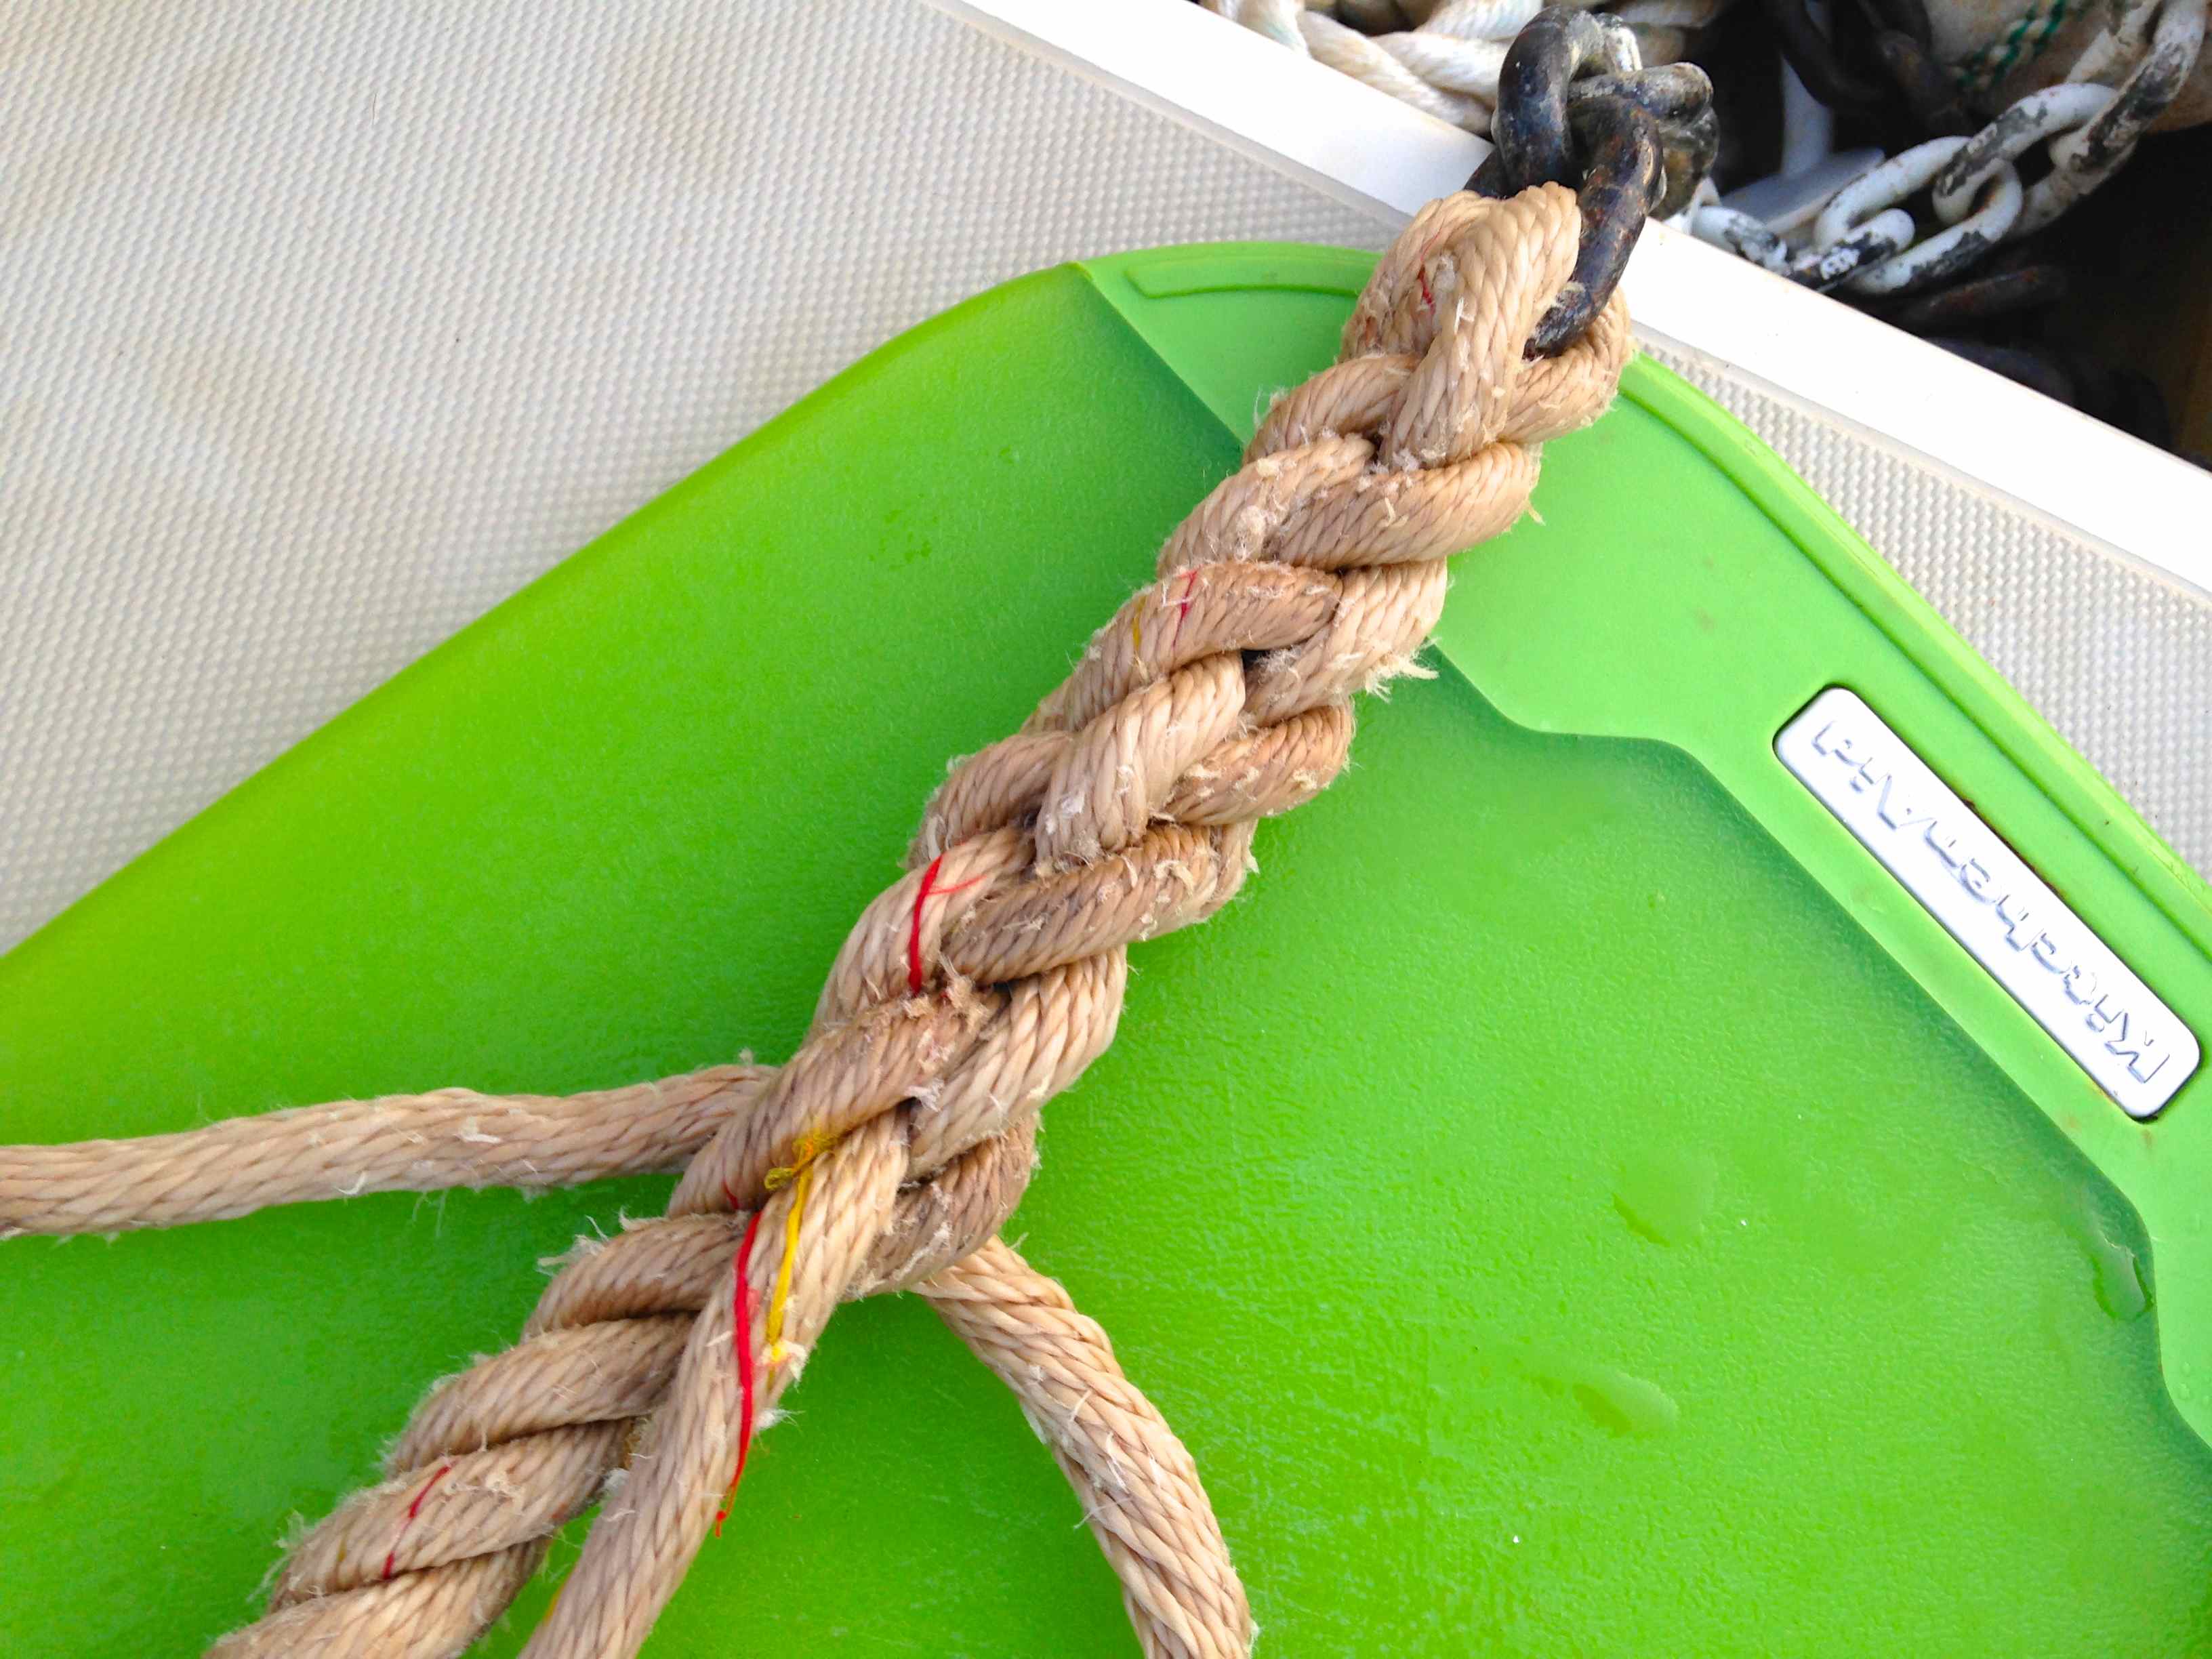
Journey currently has 100 feet of 5/16” G40 anchor chain which is connected to another 120 feet of 5/8” 3-strand nylon rope as the primary anchor rode. When we were in the Bahamas, we rarely, if ever, needed to use more than just the chain for anchoring since the water is fairly shallow and the tides are in the 3 foot range. But once we got back in the US, we found ourselves sometimes needing all of the chain and some of the rope because the anchorages are not only a little deeper, but the tidal swings are also greater. After anchoring one day using all of the chain, Drena noticed that there was some damage on the splice that connects our rope to our chain. After examining it closely, we decided the damage could be due to the thickness of the splice being sent, one too many times, through the windlass (oops, newbie error!) Since the whole assembly is only as strong as the weakest link, or splice in this case, we decided we would avoid using more than the 100 feet of chain until we had a chance to repair the splice.
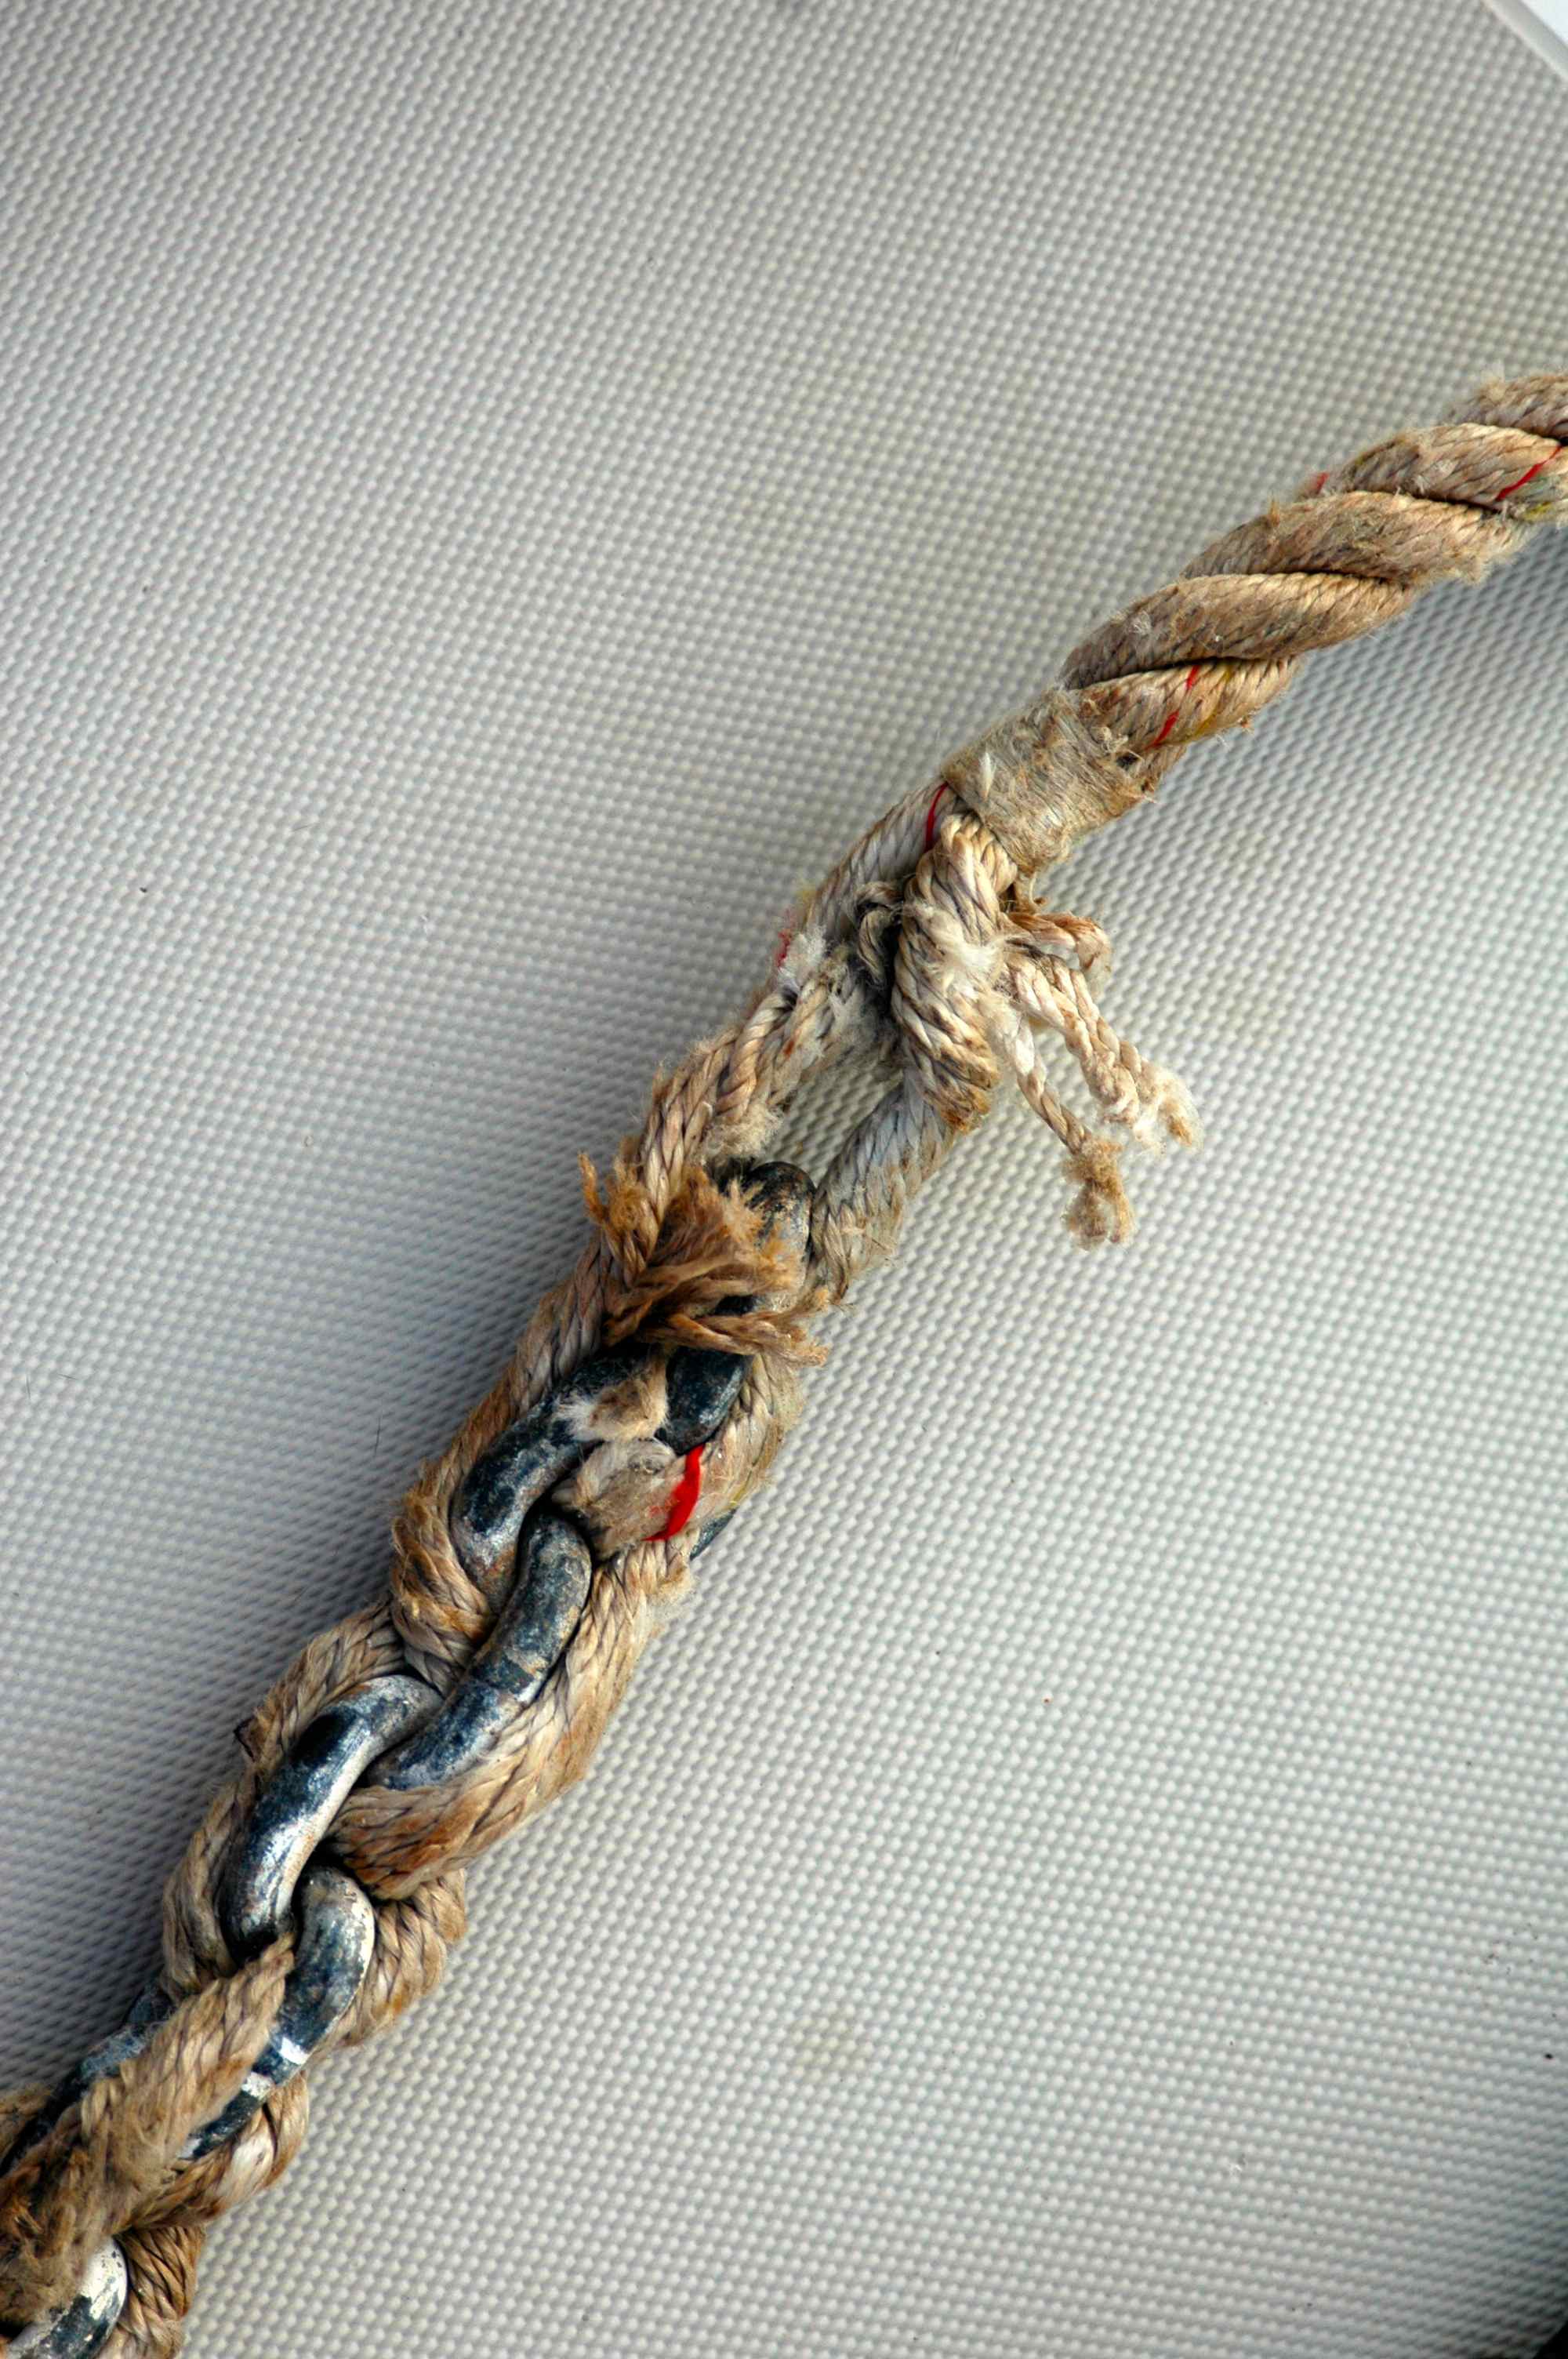
This is the damaged we noticed. What do you think? Windlass?
Thankfully, we made it all the way through Georgia without needing to use the rope part of the anchor rode and had a chance to re-splice when we were in Beaufort, SC. I had already done my homework on the “best” way to splice rope to chain (I am sure there are differing opinions on this) and especially for use in a windlass, and found that many claim the “chain splice” has the best strength (at 95% of the strength of the rope itself) and is less likely to chafe than other splicing techniques. Since I had already done some similar splices for our snubber line that is pretty trustworthy and seems to have held up so far, we figured we could trust my rope-to-chain splice just as much on the anchor rode.
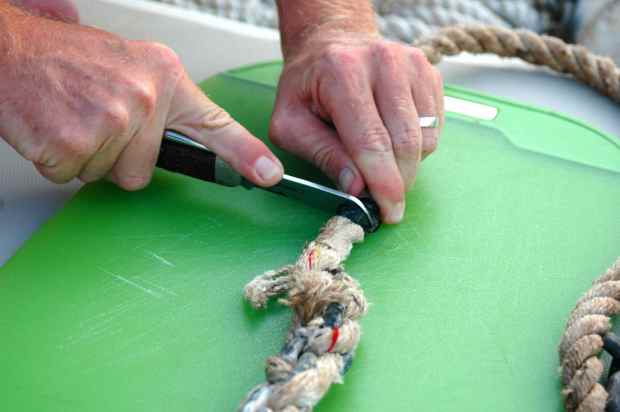
First I cut out the old splice, which seemed like the windlass didn’t like anyway, and then unraveled way more of the rope than I thought I would need just to make sure I had enough.

Cutting off the old splice.
Then, I taped and burned all three strands of the nylon rope to prevent them from unraveling.
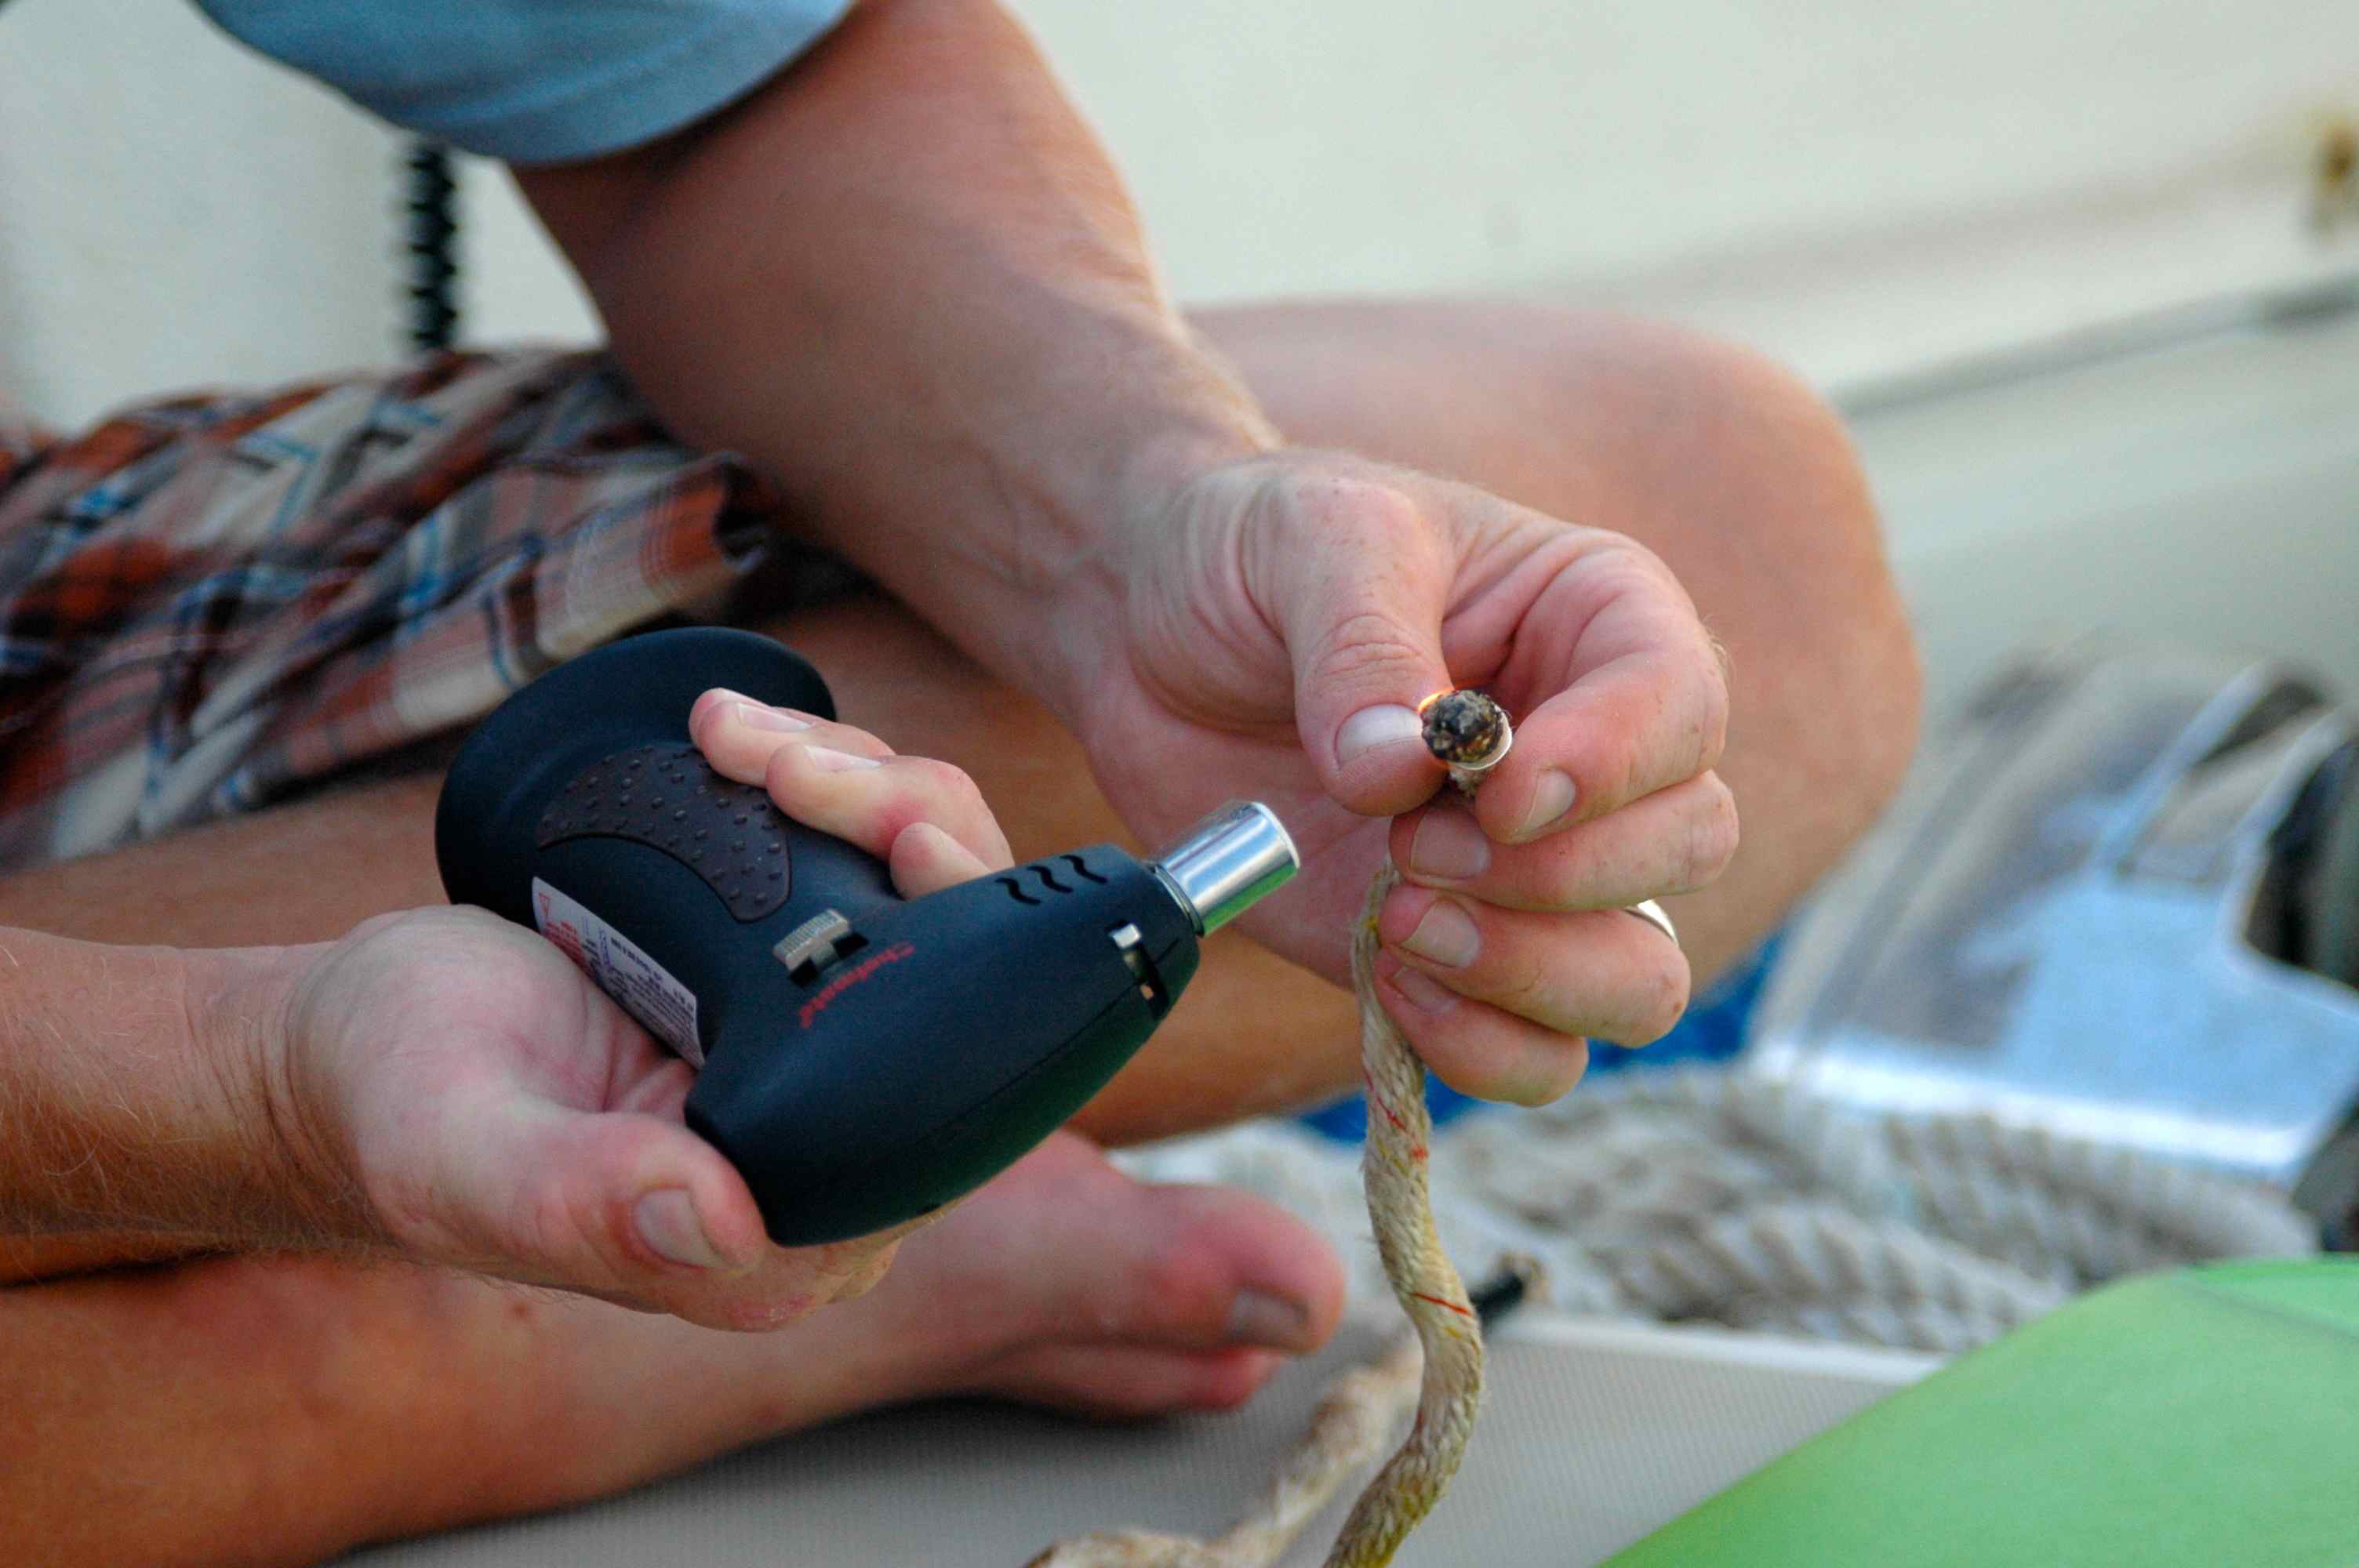
Burning the ends with a creme brûlée torch. Great tool to have on a boat!
Next, I took two strands through the chain one way and the third strand through the same link the opposite way and threaded the rope into itself.
Here I am, happy that Leo is paying me a visit while chain splicing :)
There is a proper technique and though I have several books on the subject of knot tying, I have found this website to be extremely helpful for its step-by-step photos and good explanations (note the iPad in the pics). Search “chain splice” to find the exact link I used.

Using my resources!
Many pre-spliced docklines I have seen have 5 tucks, but many sources suggest 7 for added security. Since I believe there is no such thing as too much security and had plenty of rope for splicing, I used 9 tucks. Now that is a secure splice! Even though we haven’t used it yet, we will have much more faith in our new splice than we had in the old damaged one. We have also learned that it really isn’t that big of a deal to just pull the splice past the windlass by hand, keeping its exposure to potential damage to a minimum.
Four tucks in!
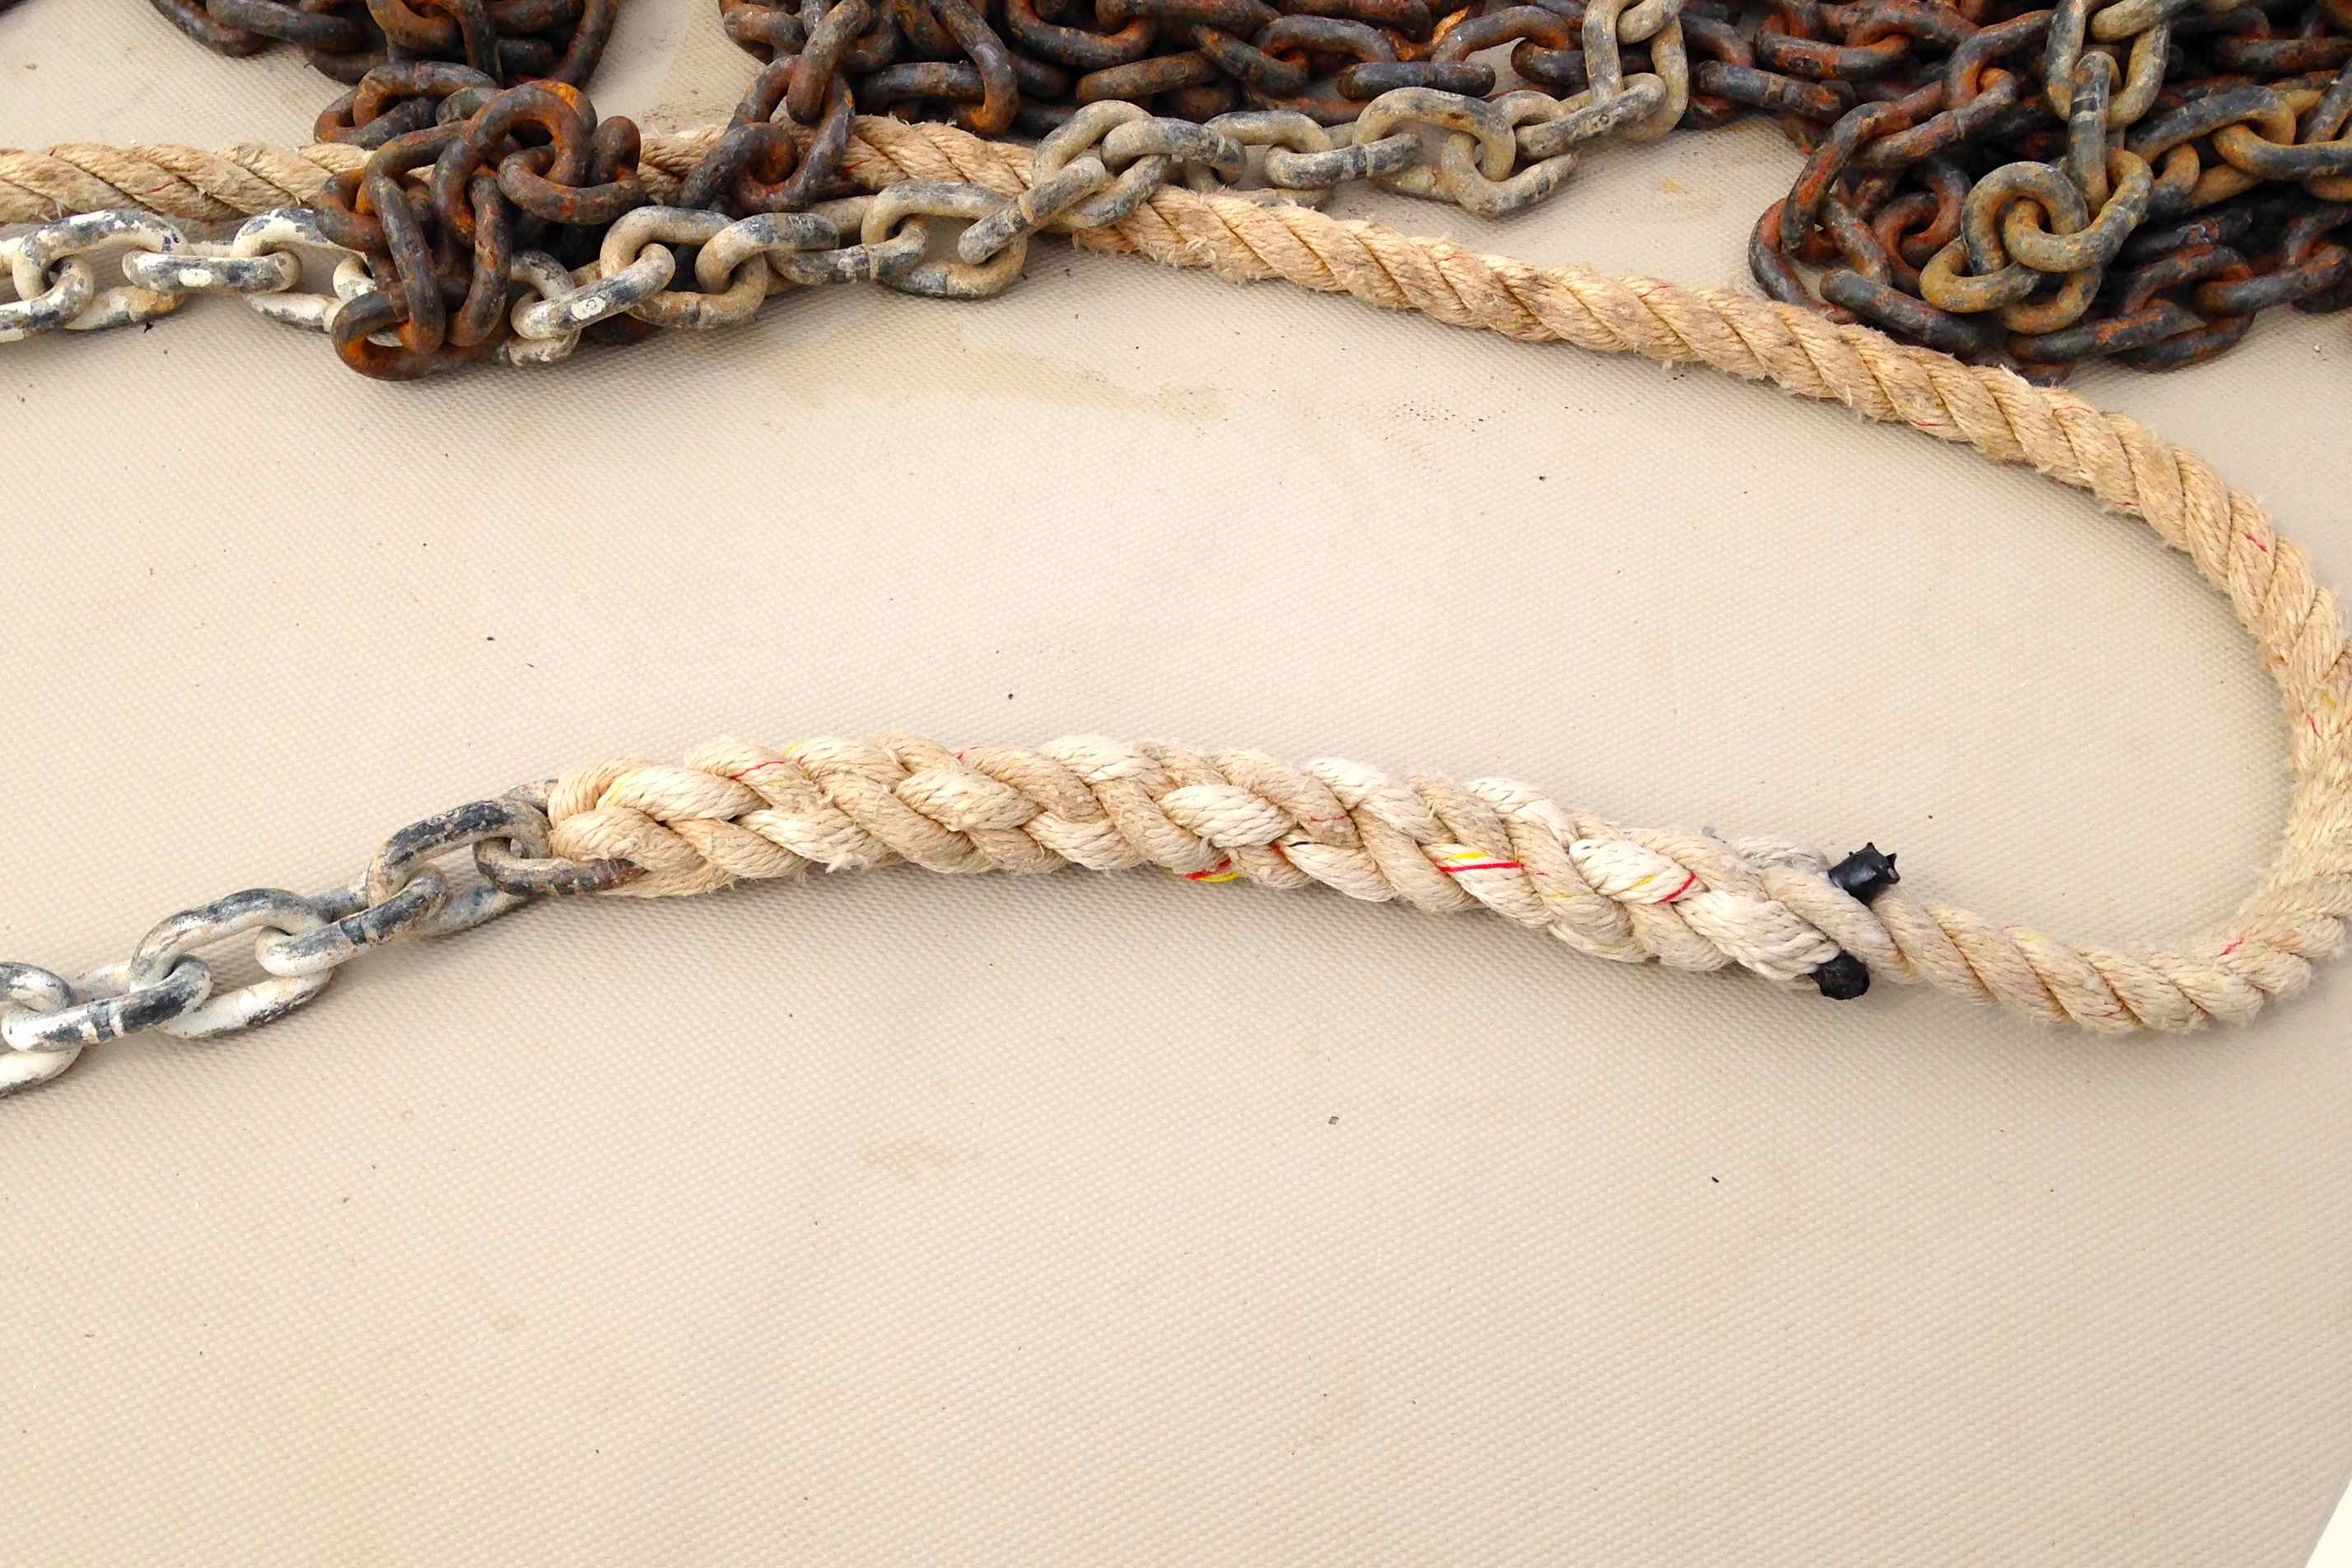
All finished. Nine tucks.
